Here are some images and basic instructions on how to tackle a 3 part plaster mold for doing slip cast pottery.
If you are interested in taking a course in mold making, you can sign up for one that Fusion is offering as part of the Fusion Conference in May. Angelo DiPetta will be teaching it. See Fusion’s website for more information. This mold was done with the instruction of Angelo.


Always measure using cm. L x W x H for a rectangular volume or Pi x r squared x H for a cylindrical volume – always use centimetres. This is the required plaster mix. Multiply the number by .6 in order to get amount of water required.
Example: 30cm x 20cm x 10cm = 6000 cubic cm or 6 litres of plaster mix, then 6000cc x .6 = 3600cc or 3.6 litres of water. You could also multiply 6 litres by .6 and get 3.6 litres. This works because 1cc = 1ml. Depending on how much the model displaces the plaster you will have little or more plaster remaining.
To see an article explaining cottle boards, visit Ceramic Arts Daily. They have a video about how they work and how to make adjustable cottles.
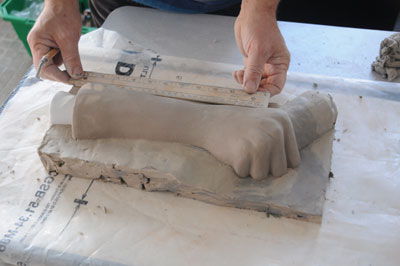
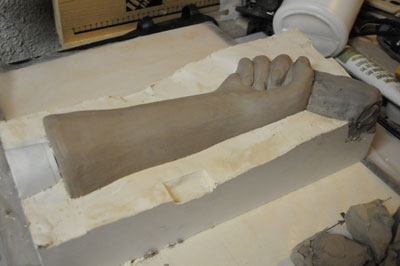
In this particular sculpture, the part that will be cut out for the entrance to the vase is lower than the highest part of the piece (i.e. the inside of the fist of the hand), so it was decided to make the pour spout at the bottom. After the piece is cast, this can be filled in. The part that is coming out of the hand is for the third piece of the mould.
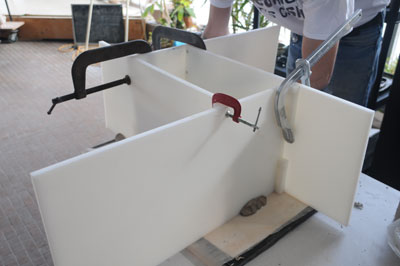
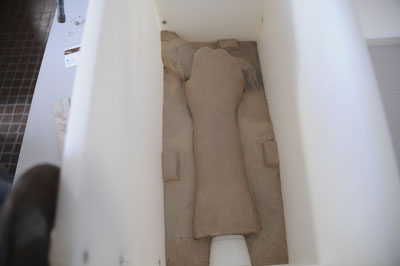
Mix your plaster and pour it carefully into the cottle. Let the plaster set up and then you can remove the boards, turn over the piece ready to do the second part of the mold.
I’ve used vaseline or Murphy’s oil soap to create a resist between the two pieces, but it is best to get mold soap from a sculpture or ceramic supplier. You paint a few coats on and let it dry and then clean it off so the surface is nice and smooth. You know you’ve done enough when it buffs up shiny.
Be careful not to get any into the inside of the cast, as you need the clay to be absorbed in that part.
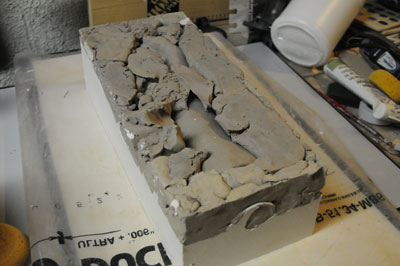
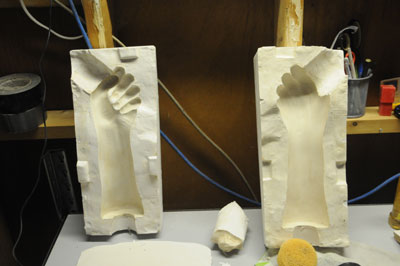
There is no image of making the final piece of the mold, but keep the two pieces you have already cast together, and remove the block of clay that was blocking off the last section. Clean as you did for the first casting and make a deep score between the two pieces to create another register. Coat the plaster again with the mold soap and when ready, pour your plaster into the last section. Let it set.
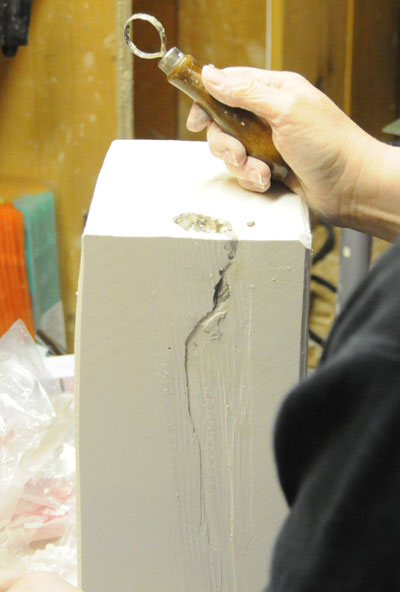
If you have a rubber mallet, tap the mould all over – this helps loosen the pieces. Then tap the stiff blade of a knife into the seem, and pry – do this all around the seem line. Sometimes the suction of the clay makes the pulling apart a bit harder.
What you should do now is round the corners of the mold and clean it up. This way you don’t have jagged edges that can chip off, and it keeps it neater. Put the mold in a warm, dry area for a few days until it is no longer damp and cold. This mold took 4 days of sitting near a register.
Next: casting a piece, which you can see here.