Some of our members have allowed us to list them on a map, this shows the areas that these members come from to be part of our guild. We hope in future that more potters will want their information on this map too. If the member has a website address, the link is listed in their name.
We were featured on Tuesday the 12th August on CHEX. The lovely presenter Caley Bedore spoke to Carolyn Cicsco our Program Director for the Kids’ Camp.
What a wonderful day we all had, learning a new decoration technique with Terrie on Sunday July 6th. Here are some photos of our workshop and some of the work we all completed! We can hardly wait until next week!
2392nonenonetruetruetrueCloseNextPreviousThe requested content cannot be loaded. Please try again later.
Our long time mentor, judge and presenter, Angelo di Petta, has launched a new website. It has a great look back at his designs from the past forty years. He says that in future, he will be adding more in the way of video, and instruction.
Once again, the Kawartha Potters Guild donated bowls (along with the Kawartha Wood Turners, the Canadian Gourd Society and the Kawartha Glass Artists Society) to the recent Empty Bowls, an event put on by the local YWCA Peterborough Haliburton.
Most potters today attend numerous workshops throughout the year, and demonstrations at guild meeting functions. There is so much wonderful info to keep track of!! Lots of people take notes, but I have a fun and easy way to keep a record of that valuable information that you can refer to regularly, which is both informative and visually appealing – notes with photos.
Any good quality sketchbook will do. I found ones which have lines on the bottom of the pages and blank space on the top. I take photos during the workshops, along with notes and space the notes evenly in my sketchbook to accommodate my interests and photos. I print my desired pics and use a glue stick insert along with the appropriate notes. It is a fantastic way to keep a good record of what you have learned.
Here are a few samples out of one of my sketchbooks. Click on any image to see the full sized picture.
2278nonenonetruetruetrueCloseNextPreviousThe requested content cannot be loaded. Please try again later.
You’ll have fun going back through the pages to find a useful tip and even just to reminisce!
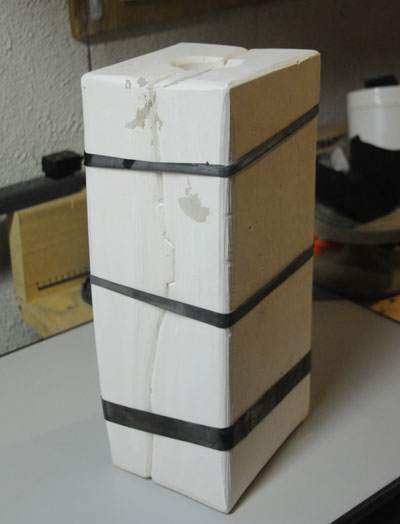
After the mold is cleaned and left to dry for a few days to a week, it is time to make your first cast.
This mold is held together by inner tube rubber, cut into piecesPour the liquid slip carefully into the mold up to the top.
You should put on a timer for about 15 minutes at first, keeping a look out for the level of the slip. As the water is absorbed into the plaster, the level of slip will go down.
Top up the slip as the moisture is absorbed
You will want to experiment on the timing, but for this casting, 30 minutes is about right to cast a piece. However, this could change depending on how many pieces you cast and how damp the mold gets.
When you feel that the casting is thick enough, pour half of the slip back into the container and then swirl the remainder of the slip around the casting for a few minutes before pouring it out.
Place the mold onto an elevated prop to allow the remainder of the slip to drip out.
The mold will now take an additional time to dry enough to remove the piece from the mold. In this case it is 30 minutes of drying time.
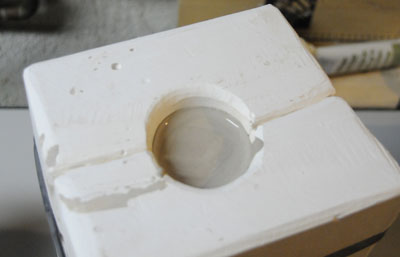
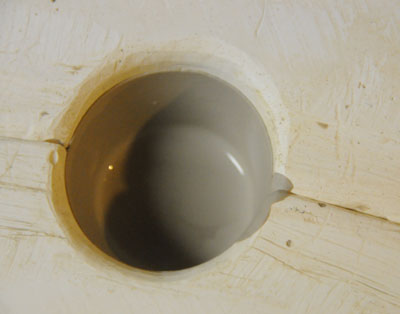
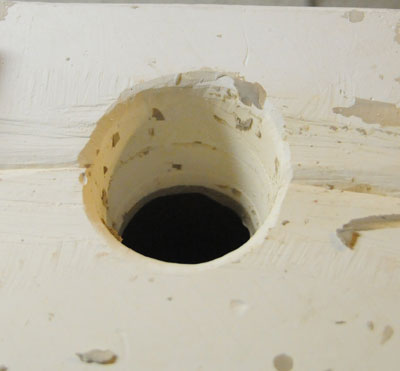
Clean the spout hole, being careful to not let the trimmed pieces fall into the sculpture.
When dry and ready to remove the piece, clean the spout hole.
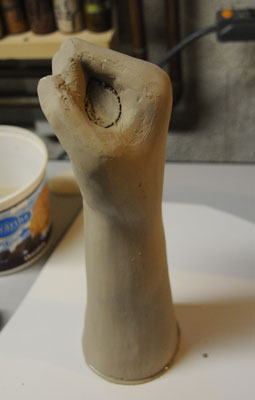
Take the bindings off from the cast and carefully pull the two pieces apart.
One side of the cast has been removed, if the piece is dry enough, carefully pull the sculpture out from the second part of the mold
In this sculpture, the third piece can now be removed as well.
As the pour spout is located at the bottom of the sculpture, we now have to close that opening.
Pour a bit of liquid slip onto a flat plaster bat and place the sculpture on top. This will quickly adhere to the sculpture and create a smooth bottom.
Trim the opening.
Your sculpture will have seams that can now be cleaned up and you can cut out the opening to the vase, again being careful not to allow the piece to fall into the sculpture.
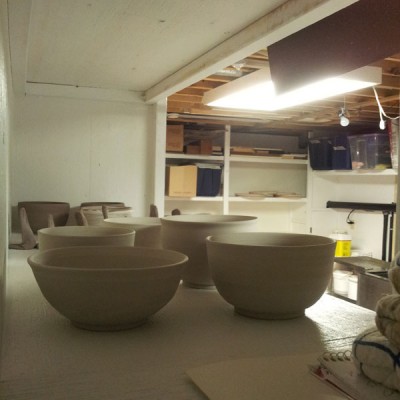
ten castings coming out of the bisque kiln.
And there you have it, the end result, bisque fired and ready to glaze.
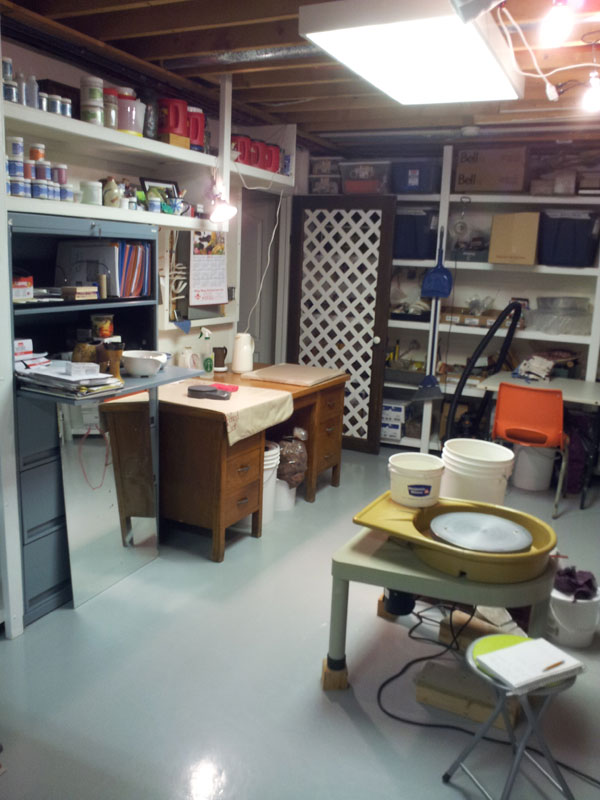
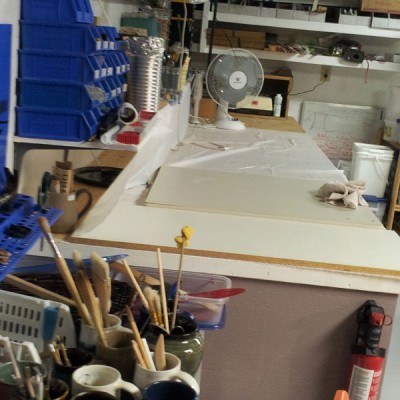
We converted the workshop in our home’s basement into my pottery workshop. The only thing it is missing is a window, and a waterfront view (haha). I am very lucky to have this space.
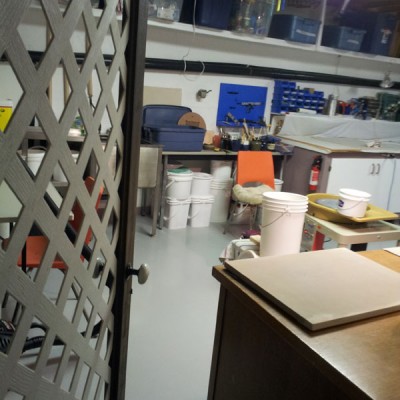
The image below is of an open door made of lattice. Ahead is my wheel, sink and far right a handy workbench. Front right is a desk that doubles up as a wedging table.
This is the entrance to my pottery room. Yes, it is filled with all things you would expect a potter to have, but it also has some pretty special touches that make it me and mine. Like the lattice door, mentioned above. My husband made the door to keep the cat and dog out so things wouldn’t get all furred up. He could have just made a solid door, but he didn’t because he wanted me to be able to see out into the rest of the basement. It also comes complete with an antique door handle we picked up in Belleville.
We combined a whack of old white/off-white paint we had kicking around, and did the walls in white to keep it bright, and did the trim in some old purple we had just for a splash of colour. The door handles were from the Re-Store and just happened to be purple too. Yikes.
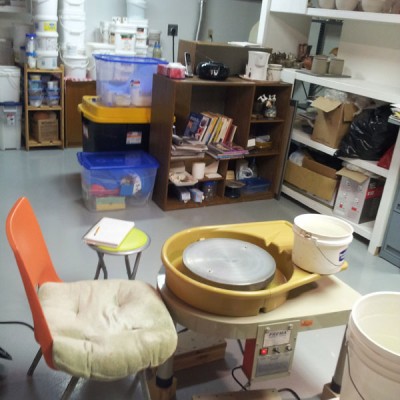
Workbench that doubles up as drying area and later on a glazing table.
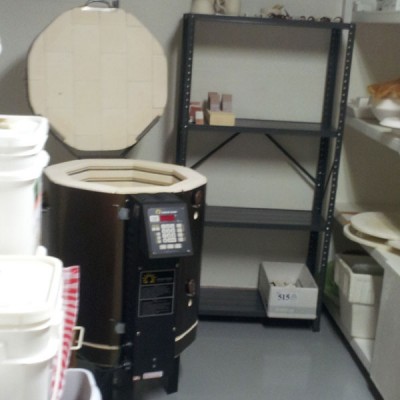
My kiln area.
Never enough space
Dry Babies Dry!
Come on in!
Looking in from my fancy lattice and antique handled door.
Looking the other way to the door. Lots of shelves.
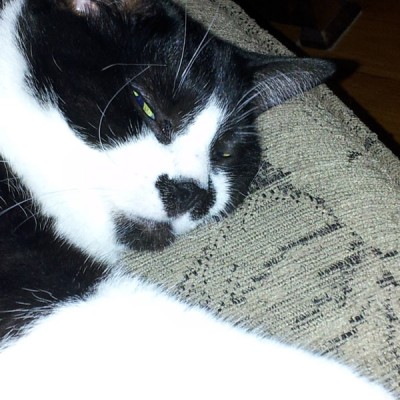
Boscoe Bear Cat
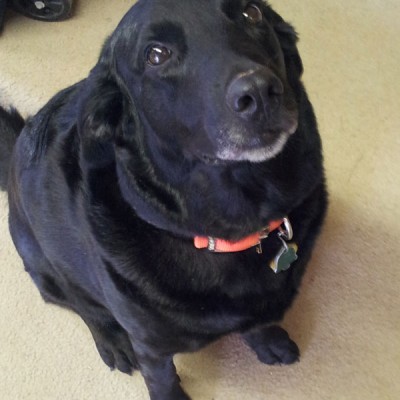
Sam Pup Pup
The room itself is filled with special things like a glass ornament over my wheel which is shaped as a flip flop. My girlfriend proudly presented it to me as she knows I detest flipflops. But it was from her, it was made of glass, which I love, and it was it was art, and so of course I appreciated that.
A picture of my old pup Mia sits on a shelf, propped up against some underglazes. Gone now for over three years, I still like to see her picture. She used to come downstairs and stare at me through the pottery door.
For inspiration, I have pots I purchased from potters who have come to KPG meetings or workshops – like Bruce Cochrane and Simon Leech and Monica Johnson to name a few.
Usually CBC is playing on a small boom box I have. I especially love The art of Persuasion; Vinyl Cafe, Q, and The Debaters. But every once in a while, I go to my collection of musicals and fire in The Lion King; the Sound of Music; Showboat or Phantom of the Opera.
It is my special place to reatreat to, and it is bright, functional, fun and mostly all mine. (Except for a few tools, the canoe and camping gear, and the stained glass tools and materials).
As you look through the doorway you see may awesome stainless sink. My husband installed it just about two years ago now, and every time I go down there to work I tell him how much I love my sink. Prior to that I lugged rinse water up 13 basement stairs, walked through the garage, and to the outdoors.
He has also built me all kinds of shelving space. (Of course it is shared with some tools, canoe and camping gear and stained glass materials, but more or less, the rest is all mine.
I have the wheel near the sink and shelves beside it for bats. I also have a huge workbench that doubles up as a place I can put pots to dry a bit, and then later I cover it up with plastic and use the bench as a glaze area.
I have a kiln and some shelves in another spot. A place for books, and a spot for coffee, tea. A perfect spot for me to work.
Here are some images and basic instructions on how to tackle a 3 part plaster mold for doing slip cast pottery.
If you are interested in taking a course in mold making, you can sign up for one that Fusion is offering as part of the Fusion Conference in May. Angelo DiPetta will be teaching it. See Fusion’s website for more information. This mold was done with the instruction of Angelo.
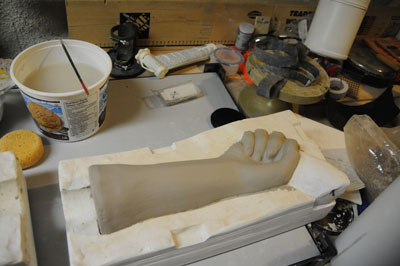
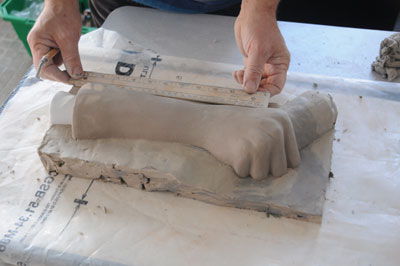
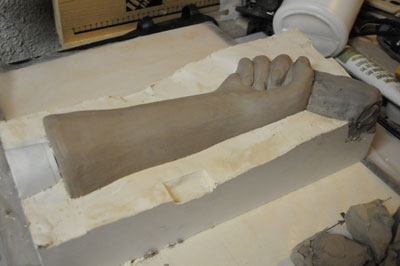
Here is the original sculpture. This is going to be a vase with an opening in the top for flowers (or other items) to go into.Here the model is being blocked off in order to protect the areas that won’t be included in the first half of the casting. The hand looks to be holding something, but that is the shape that will end up as the third piece to be cast.Here the area is being measured to calculate the amount of plaster that is used.
Always measure using cm. L x W x H for a rectangular volume or Pi x r squared x H for a cylindrical volume – always use centimetres. This is the required plaster mix. Multiply the number by .6 in order to get amount of water required. Example: 30cm x 20cm x 10cm = 6000 cubic cm or 6 litres of plaster mix, then 6000cc x .6 = 3600cc or 3.6 litres of water. You could also multiply 6 litres by .6 and get 3.6 litres. This works because 1cc = 1ml. Depending on how much the model displaces the plaster you will have little or more plaster remaining.
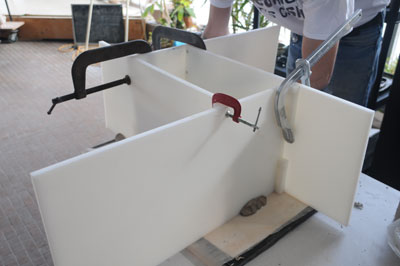
This is the cottle board all set up. It’s a bit large for this project but it does the trick.
To see an article explaining cottle boards, visit Ceramic Arts Daily. They have a video about how they work and how to make adjustable cottles.
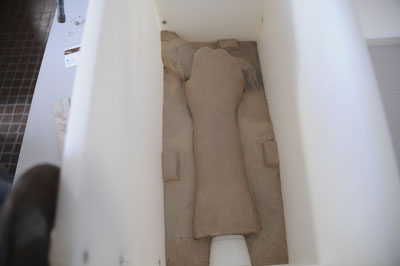
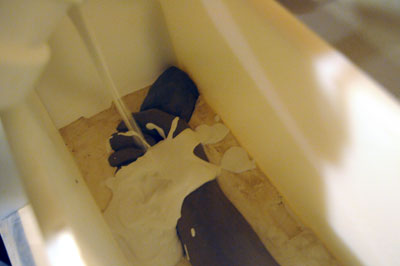
The piece is set up and ready for the plaster. Ensure that there are no gaps in your cottle boards, that you have a pour spout. In this sculpture the pour spout will be from the bottom due to the shape of the sculpture.
In this particular sculpture, the part that will be cut out for the entrance to the vase is lower than the highest part of the piece (i.e. the inside of the fist of the hand), so it was decided to make the pour spout at the bottom. After the piece is cast, this can be filled in. The part that is coming out of the hand is for the third piece of the mould.
Mix your plaster and pour it carefully into the cottle. Let the plaster set up and then you can remove the boards, turn over the piece ready to do the second part of the mold.
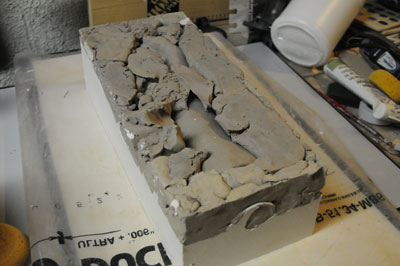
This is the piece after the first part of the mold is done. Carefully take away the scrap clay that you used to block off the other side.Here is the piece cleaned up and ready to cast the second half. You must seal the plaster with a resist so that the second half of the mold doesn’t stick to the first side. Or you will have one piece that never comes apart. Use mold soap concentrate.
I’ve used vaseline or Murphy’s oil soap to create a resist between the two pieces, but it is best to get mold soap from a sculpture or ceramic supplier. You paint a few coats on and let it dry and then clean it off so the surface is nice and smooth. You know you’ve done enough when it buffs up shiny.
Be careful not to get any into the inside of the cast, as you need the clay to be absorbed in that part.
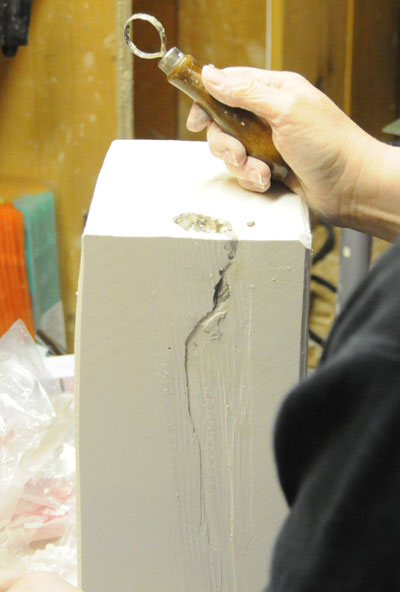
You can now carefully pour the plaster for the second half of the mold. You should always pour the plaster carefully away from the piece you are casting, not directly on the piece (as you see in this image).
There is no image of making the final piece of the mold, but keep the two pieces you have already cast together, and remove the block of clay that was blocking off the last section. Clean as you did for the first casting and make a deep score between the two pieces to create another register. Coat the plaster again with the mold soap and when ready, pour your plaster into the last section. Let it set.
Now you can separate the pieces. In this case plaster covered the first piece again, so some cleaning was needed to see the seam between the two pieces.
If you have a rubber mallet, tap the mould all over – this helps loosen the pieces. Then tap the stiff blade of a knife into the seem, and pry – do this all around the seem line. Sometimes the suction of the clay makes the pulling apart a bit harder.
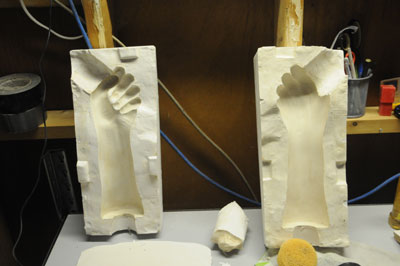
Here are the three parts now opened up.
What you should do now is round the corners of the mold and clean it up. This way you don’t have jagged edges that can chip off, and it keeps it neater. Put the mold in a warm, dry area for a few days until it is no longer damp and cold. This mold took 4 days of sitting near a register.
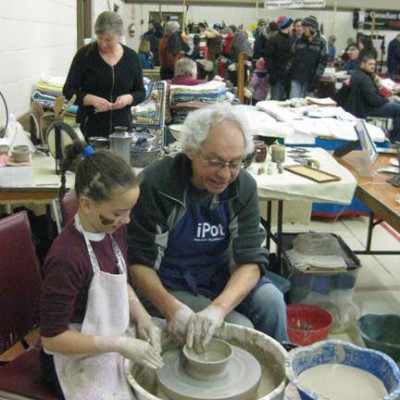
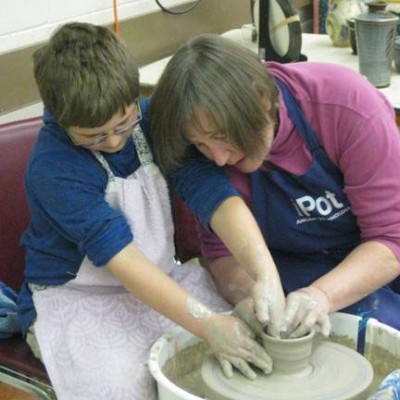
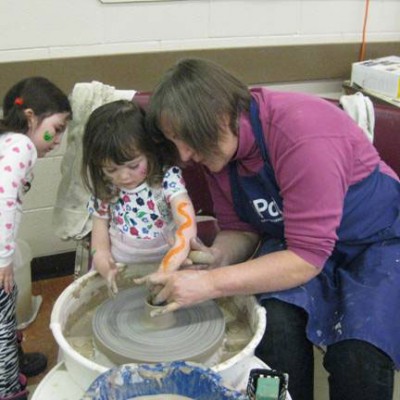
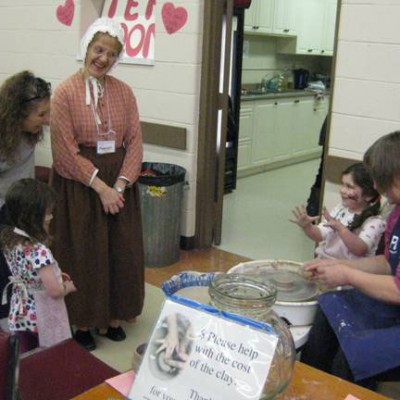
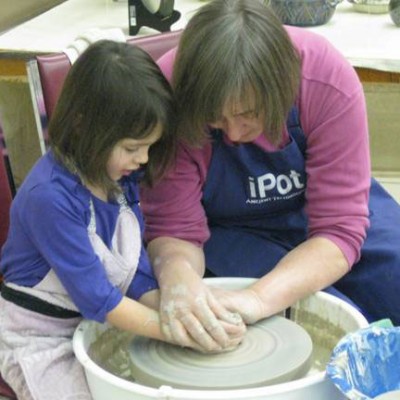
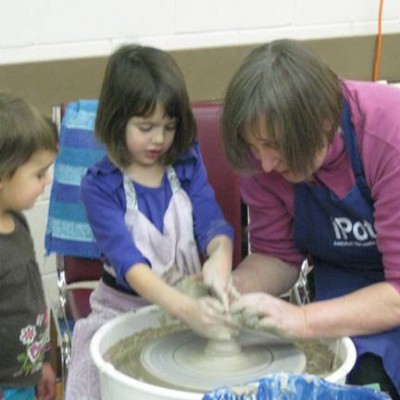
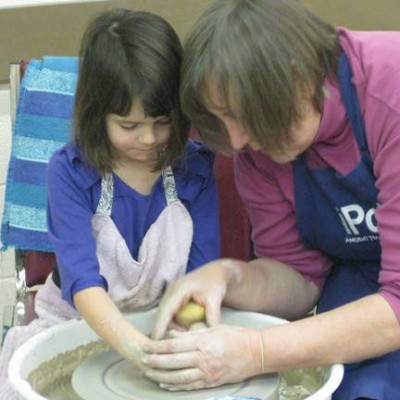
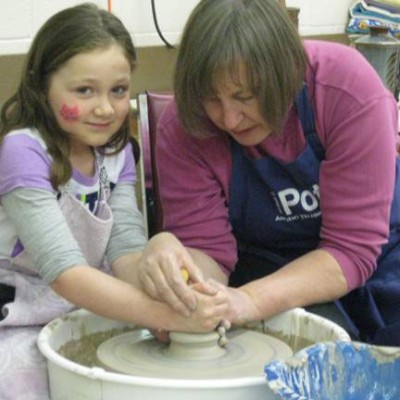
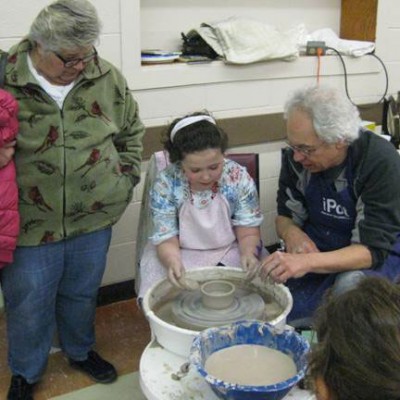
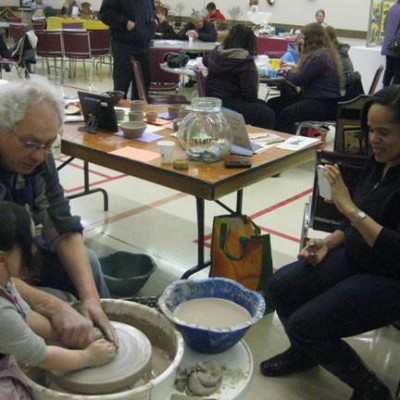
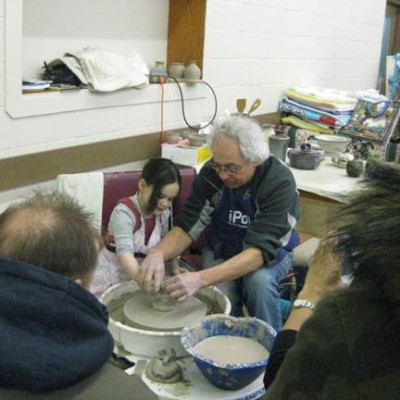
A great experience for us at Heritage Day at the Buckhorn Community Centre on Feb. 15th. Lots of demonstrations of heritage crafts both inside and outside the building, as well as outdoor activities for the kids.
June Goodwin did her usual magic with the children, creating lots of small bowls. George Stewart finished the day with the kids (and one adult) making bowls and a flower pot. Vicky Kilner and Lillian Forester had the opportunity of talking with the parents and grandparents about the guild and the gallery, as well as promoting the kids camp this summer. A very successful day with plenty of happy faces on the children.